Starus Photo Recovery is a truly invaluable tool to any photographer or amateur shooter. Should anything happen to your images, the tool can be used to recover them from the hard drive, memory card or USB thumb drive. Whether your photos were deleted or stored on a formatted, corrupted or otherwise inaccessible memory card, Starus Photo Recovery is always there to help.

You can try Starus Photo Recovery before making a purchase. Equipped with instant preview, the tool displays recoverable images before they are recovered. If you can see a picture in the instant preview window, your chances of getting it back are close to 100%.
How To Recover Pictures from a Camera
Starus Photo Recovery must be installed before you can use it. While installing a Windows app is like installing any other one, when data recovery is concerned you must observe one important rule. Never (and I mean, never!) install a data recovery tool such as Starus Photo Recovery onto the same disk you’ll be recovering files from! In other words, if your pictures are stored on drive C:, you can choose any other drive letter except C: to install Starus Photo Recovery to. Similarly, if your pictures were stored on a memory card, you can safely install Starus Photo Recovery onto the hard drive.

How To Recover Pictures with a Wizard
We designed Starus Photo Recovery to be easily usable out of the box. Thanks to the step-by-step wizard, you can use the tool right away without spending much time learning and configuring. The wizard will guide you through the entire process one step after another, helping you specify the device, choose recovery options, list and preview images before they are recovered, and of course save them onto a new media. Let’s take a closer look at the process.

Where Are Your Pictures?
Or, rather, were they used to be? Choosing the correct disk, volume or storage device is the first step to getting your pictures back. The picture recovery wizard will help you make the right choice. In addition to specifying a drive letter, you can also select to search the entire physical device (e.g. the whole hard disk). However, this may take a lot longer to scan as Starus Photo Recovery will attempt to read the entire content of the device.
But what should you do if the images were stored on a partition or volume that was deleted or lost after a hard disk accident? If this is the case, we recommend using a tool to scan your hard drive for available partitions. To do that, select the hard disk from the list of physical devices, and use the Options – Discover Partitions command.
The tool will automatically discover available partitions and add them to the list of available volumes. From now on, you can use them to recover pictures from as you would use any other disk.
Click Next to move on.
Fast or Comprehensive Analysis?
In fact, you can choose both! But let’s have a look at what these two option offer, and how they are different.
During the Quick Scan analysis, Starus Photo Recovery will look at the file system in order to identify deleted or missing images. The Quick Scan mode allows recovering the complete information about the file including its location on the disk, file name, date and time and other attributes. While this is extremely fast (the scan is usually completed in a matter of seconds), it may not be able to detect images that were deleted a long time ago, or pictures stored on a formatted partition. If this is the case, you can use Deep Scan.
In Deep Scan mode, the tool will read the entire content of the device. Starus Photo Recovery maintains a database of characteristic signatures allowing the tool to identify pictures by persistent parts of their content. As a result, Deep Scan will be able to reliably detect, locate and recover images that were deleted a long time ago, or that were stored on a formatted, deleted or corrupted partition.
Naturally, Deep Scan works much, much longer than Quick Scan. Depending on the size of your disk, scanning may take minutes or even hours. For example, a 32 GB SDHC card is usually scanned in about 10 to 50 minutes (depending on the speed of the card itself), while a 1 TB hard drive will take up to 3 to 4 hours to complete. Another limitation of Deep Scan is that no file names or attributes will be recovered.
But what if you want everything to be recovered yet want the file names, too? In this case, simply tick both options by choosing “Both analysis types”. Starus Photo Recovery will then scan the file system first and disk surface next, ensuring that you get every piece of information down to the last bit.
Click Next to move on.
What to Look For
Starus Photo Recovery offers numerous options as to which files to look for. You can, for example, set the tool to only look for deleted files, or only existing files (if you are recovering from a corrupted memory card, for example), or both. You can search for files of a certain size or date range, filter by file names (in Quick Scan mode only) or specify which types of files to recover.
Click Next to move on.
Recovering Images with Instant Preview
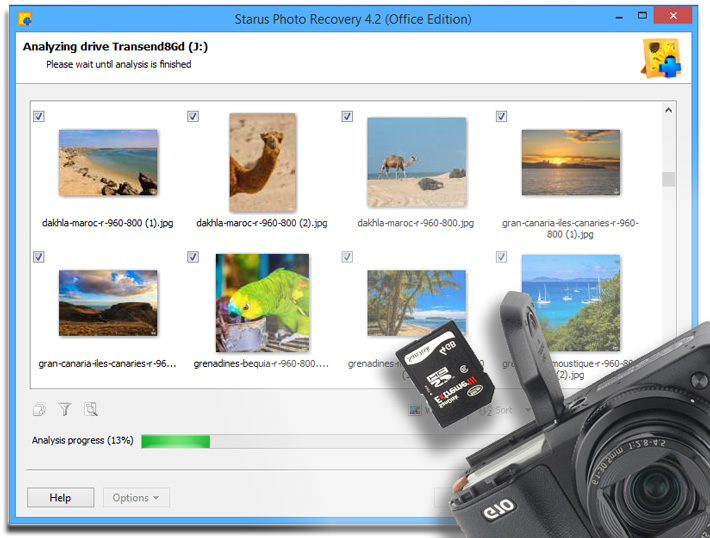
Once you begin scanning the disk, Starus Photo Recovery will automatically update the file list as it works. The photos will appear as thumbnail-sized previews. At this time, you’ll be able to apply sorting and filtering options.
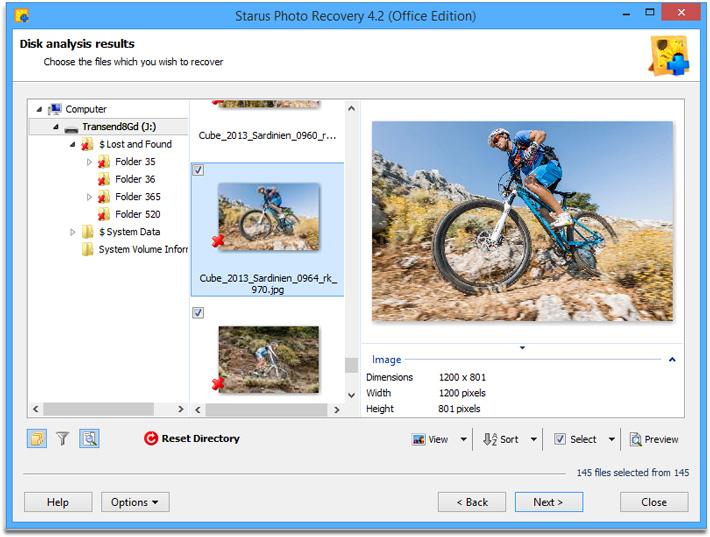
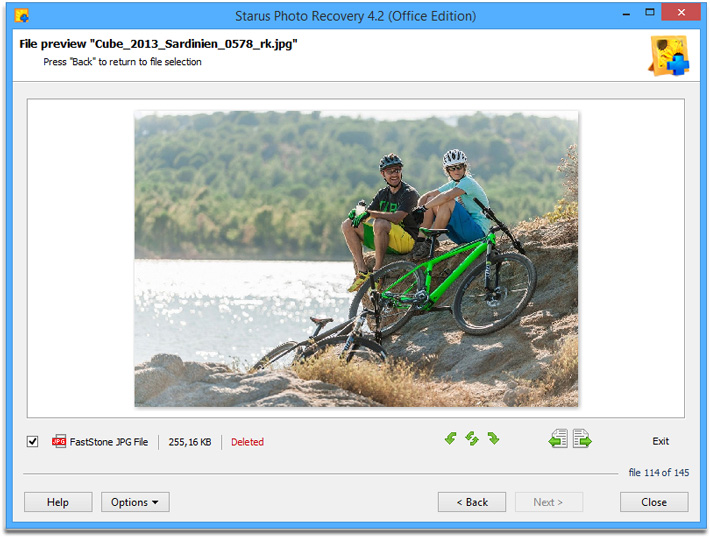
Once the scanning process is complete, you’ll see the file list in a new window. Click on any picture to open full-size instant preview.
The Final Step: Saving the Images
Once you are done previewing, select photos to recover. You can select all or some pictures (or just one or two). Click Next to move on to the saving wizard.
While saving files doesn’t normally raise questions, this same operation executed by a data recovery tool requires special consideration. Never (and I mean, NEVER!) save files being recovered onto the same disk you’re restoring them from. Always use a different drive letter or a separate device (e.g. a USB flash drive) to save the files to.

Starus Photo Recovery offers a bunch of options to make the choice easy. You can save pictures to a new drive letter, burn CD/DVD media, create ISO images or upload files onto an FTP server.
Saving Onto a Hard Drive
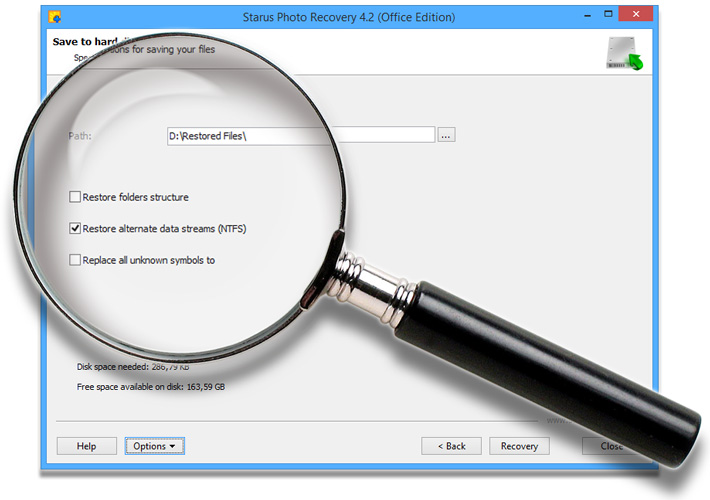
Using a drive letter is the fastest and easiest way to save pictures. As noted, make sure you actually use a DIFFERENT drive to save the pictures to, and NOT the disk you are recovering from. I can’t stress enough how important this is. If you ignore this simple rule, you can ruin your entire recovery effort.
Other than this simple rule, the process is simple. Choose a folder to accept the files, and click Recover. Starus Photo Recovery will begin saving files. While it may take a while, this process is usually much faster compared to Deep Scan.
There’s an option to restore the original folder structure. Select “Recover folder structure” if you’d like your images to be placed into their corresponding folders. If this option is unchecked, all pictures will be saved into a single folder.
Burning a CD / DVD
Starus Photo Recovery comes with a built-in CD/DVD burner. By using this feature, you can recover pictures and burn them onto a blank CD or DVD media without having to save them onto a hard drive first.
Burning blanks with Starus Photo Recovery is no different from using any other CD/DVD burner. Specify disc label, choose the file system and optionally erase rewriteable media before you go. You can specify write speed and choose how to handle multisession discs in advanced options.
Making ISO Images
If you’d like to burn your pictures onto a CD/DVD but don’t have a disc writer in your computer, you can set Starus Photo Recovery to produce a bunch of ISO images. You can then burn those ISO images to CD/DVD blanks with any CD/DVD burning software.
FTP Upload
If you don’t have enough free space available locally, or if you are recovering pictures for somebody else, you can use FTP upload as your saving option. Starus Photo Recovery offers a fully featured built-in FTP client allowing for direct upload. All you need is specifying an FTP server address and setting any additional options if required. For example, you can specify a remote folder to receive files, set FTP port etc.
Please note that FTP connections are much slower compared to a local hard drive. As a result, recovering pictures to an FTP server may take significantly more time compared to fully local recovery. The FTP protocol has multiple small delays on each file operation. If you are recovering hundreds small images, FTP uploading them may take a while.