In this article, we will examine the design of a simple ATX power supply, and show you what components are usually missing in cheap Chinese power supplies due to the manufacturer’s desire to make it even cheaper. We will say a few words about their reliability and the most widespread causes for their breakdown. We will also demonstrate how to diagnose their possible defects and measure voltage under load and without it.
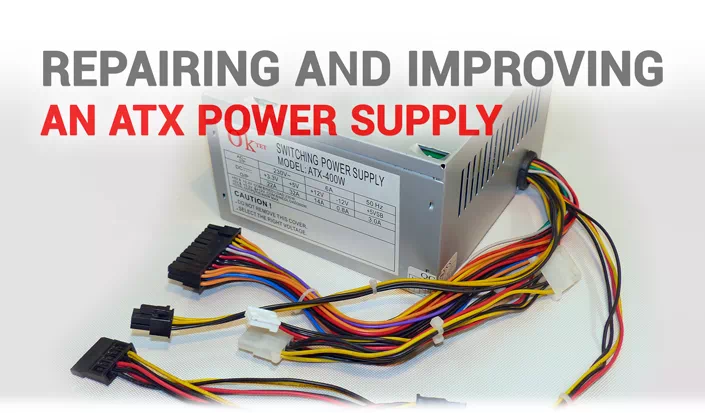
For illustration, we’ll be using this power supply model, Oktet ATX-400W.
- Capacity: 400 W
- ATX form factor
- Efficiency rating: 70%
- Cooling: 80 mm fan
- Power Factor Correction module: active
- Voltage stabilization: none
- Overload protection: none
- Short circuit protection: yes
- The main cause of damage and correct capacity calculation for ATX power supplies
- How to check the output voltage
- Design of simple ATX power supplies
- Eliminating defects and improving the power supply
- After all the improvements, the device should be tested.
- How to connect an incandescent light bulb for testing the PSU under load
- Questions and answers
- Comments
The main cause of damage and correct capacity calculation for ATX power supplies
Because of mistakes in capacity calculation this PSU survived a short circuit under load. Insulation on the outer load wires has melted and some wires burnt completely.
Why did it happen?
The advertised capacity of the power supply unit is 400 W, but the real output of such dirt-cheap PSU is about 250 W at best.
Modern computers draw most of the power they consume in the 12-volt rail. This is the rail that powers almost everything in your machine. If you look at the 12-volt / 15-amp rail of this PSU and convert it into watts, you will get its true capacity of 180 W (12V*15А = 180 W).
Here’s the conclusion: be very attentive when you look at the stickers on the PSU you’re about to buy, and focus on the 12-volt rail figure.
Here’s an example of a good quality 400 W PSU with correct power specifications. In this case, you can see easily how much real power you get in the 12-volt rail – the true 275 W.
Still, this power supply provides correct voltage in all rails (12-volt, 5-volt, 3.3-volt), so the bottom line is as follows: such PSUs are quite durable but not too reliable, as they don’t offer either voltage stabilization or overload protection. Often, some components are missing from such power supplies, and they can break down, knocking out your motherboard or processor as well.
How to check the output voltage
You can use ready-made solutions from China – such as this digital tester – to find out how much power the PSU really gives you.
Also, an ordinary voltmeter will do. First of all, you’ll have to turn the power supply on, and it requires locating the standby contact first. You can see it in the main connector that delivers power to the motherboard: this is the green wire.
To start the PSU, connect this contact with the black wire (ground). You can do it with a paper clip or tweezers. Voltage on outer power connectors will only appear after the power supply turns on – you can notice it by rotating cooling fan.
After the PSU starts, check the voltage readings for all rails.
If all figures are normal, connect an equivalent of load.
In this role, you can use a 12-volt light bulb with the capacity of around 100 W.
Yet there is a better plan: take the power supply apart and examine its components visually before connecting an equivalent of load. We need to make sure the chokes are not burnt, and the high-voltage capacitors are not bulging.
Take out the four screws, remove the top cover, pick the circuit board carefully and examine it. Visually, there is no damage to the inside, the capacitors are intact, and the circuit board is clean.
Design of simple ATX power supplies
This power supply follows a typical design for ATX units. The input voltage of 220V comes from the power connector to the circuit board – which is missing an input surge protector, but there is an empty place for soldering it, which suggests another attempt of the Chinese manufacturer to save on the seemingly “unnecessary” components.
After that, voltage travels to the diode (rectifier) bridge, and we can see two storage capacitors, 470 microfarads each, which is the minimal capacity for the advertised power output.
On the first heatsink, there are two semiconductor power keys and the transistor of the multiple-output standby voltage generator. Behind it, there is an isolating transformer and a standby transformer.
On the other heatsink, you can see the low-voltage part of the PSU, Schottky diodes, followed by the choke coil for +5-volt and +12-volt rail, and a choke for the 3.3-volt rail, the power cables for external connectors and the power line for the cooling fan.
Eliminating defects and improving the power supply
We checked the diodes in the rectifier bridge for breakdown, but they work properly. Now, the first thing to be replaced is the wires used to deliver power to other components of the computer. The power cable for the motherboard is not damaged.
Now we’ve replaced the wires and added some upgrades to this PSU. In the output part, we added three 1,500 microfarads capacitors as the stock 1,000 microfarads capacitors were insufficient for the advertised capacity of the PSU. We also added a choke and filtering capacitors for the input voltage of the 220V main. In the high-voltage part, we also had to replace the stock capacitors with high-quality ones, 560 microfarads each, because testing of the capacitors soldered to the circuit board revealed there were only two Chinese capacitors with the actual capacity of 250 microfarads each – instead of the two capacitors 470 microfarads each as recommended for such configurations.
After all the improvements, the device should be tested.
Connect input voltage of 220V, check the standby voltage on the motherboard power connector, connect this contact with the ground cable and start the power supply. The power supply starts, and the cooling fan is rotating.
Let’s check the voltage for every rail – 5-volt, 12-volt and 3.3-volt.
- +5-volt rail – 5V
- +12-volt rail – 11.97V
- 3.3-volt rail – 3.38V
How to connect an incandescent light bulb for testing the PSU under load
There is one thing we’d like to draw your attention to when using a powerful incandescent light bulb as an equivalent of load.
The incandescent light bulb is a non-linear element, and its resistance changes as the filament becomes warmer. When it’s cold, it has a very low resistance – 0.3 Ohm, for example. That’s why when you connect it to a 12-volt rail as an equivalent of load, the overcurrent protection element responds.
But if you warm the filament inside the bulb with lower voltage, for example, 5V, and then connect it to a 12-volt rail, the PSU protection will not respond, As the filament has been heated and its resistance has increased. Now let’s try measuring the filament resistance right after you cut off the power supply – it says over 4 Ohm! As the light bulb cools down, its resistance gest lower, and you will see about 0.2 Ohm at room temperature.
With the cold bulb having resistance of 0.2 Ohm, the current impulse will be about 60 amps (Ohm’s law – I=V/Ohm), which exceeds the permissible current for a 12-volt rail of an ATX switching power supply. With the bulb which has been warmed up, the 12-volt rail current will only be between 2A and 5A.
Now let’s try connecting additional load – in the form of this light bulb, and the PSU protection is not supposed to react. At first, connect the bulb to the 5-volt rail – it only glows but not shines. Now let’s change it to the 12-volt rail – the light becomes brighter.
The next stage is to take voltage readings from every rail when under load.
- 12-volt rail dips down to 11.72V
- 5-volt rail – to 4.98V
- 3-volt rail – to 3.31V
All readings fall within the permitted limits.
If the power supply works steadily, it’s time to put it together.
Don’t forget to put a protective clip on the cables to avoid breakdown to chassis which may occur when their insulation is damaged.
After that, the power supply should be tested again, with load applied to the 12-volt rail. Now that it works properly, you can even use it to build a low-end PC.
Now that the experiment is over, let’s hope your repairs are always successful, and all your devices work as they should for a very long time.